Pages

Showing posts with label beef. Show all posts

Tuesday, April 7, 2015

Make a Batch of Meatballs

One of the things I have loved about paleo cooking is learning to make things in batches. Since there aren't many choices when it comes to finding something quick to eat that is also paleo, batch cooking is our lifeline. When I first learned of the concept I wondered why everyone doesn't employ this strategy. Would you rather spend an hour in the kitchen every night or a few hours on the weekend? The few hours on the weekend are used to cook things that require the largest time investment: Squash, sweet potatoes, beets, and of course meats. Then during the week all you have to do is heat up the time intensive foods and cook up a few quick vegetables.

Based on my friends and the comments I read online people:

  • 1) don't have much time to cook
  • 2) want something quick and easy
  • 3) are working with a budget
So my goal has been to create recipes that are as close to meeting those criteria as I can. Ground beef is one of the cheapest cuts of meat on the market. When it comes to buying beef grass fed is significantly healthier than grain fed. Grass fed has more anti-inflammatory Omega 3's and nutrients whereas grain fed is low in Omega 3's. Grain fed is also high in inflammatory Omega 6's and is more likely to come with a hefty dose of antibiotics and pesticides. If you've never shopped for grass fed beef you're most likely going to be in for a sticker shock. Grain fed is significantly cheaper because our government subsidizes grain crops but not grass. Your cheapest bet is going to be a local source by cutting out the middle man. For me I'd rather eat less meat of a higher quality than an abundance of meat that creates inflammation. I found a local butcher, Meats Royale, that carries grass finished beef, without hormones or antibiotics, and no GMO feed. As it turns out meat cannot receive a grade from the USDA unless it is grain fed. Grains are necessary for an animal to create marbling, ie fat, in the meat. Be aware of tricky labeling, organic beef can still be grain fed so look for grass fed.

A few years ago I looked in Julia Child's, Mastering the Art of French Cooking, to see what she would do with ground beef. So I tried her Bifteck Hache a la Lyonnaise and I fell in love. I never knew that ground beef could taste so good. It was like a poor man's fancy steak dinner. Ever since then I have always gravitated towards that flavor profile because not only is it delicious it's also simple. In Julia's original recipe she sautees onions but I wanted this recipe to be quick and easy so I opted for onion powder instead. I also tried to make the math pretty with this recipe. I used 3 lbs of ground beef but all of the measurements can be easily converted to any number of pounds you use. Simply remember that 3 teaspoons equals 1 tablespoon and the math will always work out.

Bifteck Hache a La Lyonnaise Meatballs (cheater version)

3 lb of ground beef
3t of coarse salt or 1.5t of finely ground salt
1.5t of dry thyme
2T of onion powder
2T of bacon fat

Combine the above ingredients in a bowl with your hands. Then roll it into balls about the size of a golf ball. For this step I used a 3T sized scoop with a trigger and I placed the balls onto a baking sheet lined with parchment paper. Parchment paper isn't necessary but it does make cleanup easier.


Bake the meatballs at 400F for 20 minutes. 


I have made this recipe more than once and I absolutely love it because the meatballs are delicious and they would pair with nearly any cuisine. You could cover them with barbecue sauce for a party, put them into a sandwich, use them with zoodles, spaghetti squash, or your favorite pasta, or you can eat them like I do just as they are with a side of your favorite vegetables. 

If you're going to freeze some of the meatballs I'd freeze them on a baking sheet and then put them into a storage container. To store them a bit longer put them into a zippered bag and zip it but leave room for a straw to be inserted. Inhale through the straw to remove as much air as possible and then finish zipping the bag as you quickly remove the straw. It's my attempt to vacuum seal without an actual vacuum sealer.

Let me know how you decided to use this recipe.

Wednesday, February 4, 2015

Julia Child's Bifteck Hache A La Lyonnaise Made AIP

After my first Whole 30 this past August I haven't been very successful in adding back the foods I gave up then. I never would have dreamed that giving up food for 30 days would cause my body to reject it in the future. This doesn't happen to everyone but it actually happens to a fair amount of people, especially if they have an autoimmune disease. I've followed the AIP lifestyle for the last 3 weeks and it finally getting to the point where it's becoming comfortable. For those who aren't familiar with AIP it stands for Auto-Immune Paleo.

I'm going to assume that you're familiar with AIP if you're reading this. If not check out The Paleo Mom, Sarah Ballantyne. She has a PhD in medical biophysics and has written a book titled: The Paleo Approach. With 1200 scientific studies cited Sarah goes into great detail about food and autoimmune disease. Did you know that everyone with an autoimmune disease has a leaky gut? That is, food particles escape the small intestine which leads to the autoimmune response.

These past few weeks the people of Pinterest have given me numerous ideas on what to eat. Thank you! Tonight I wanted something familiar. I wanted comfort food and I wanted something quick. When I first made Julia Child's Bifteck Hache A La Lyonnaise I was blown away that ground beef could taste so good. It's sort of like a poor man's fancy dinner. I knew the recipe wasn't AIP compliant so I tweaked it.


Instead of butter I used bacon fat and I omitted the pepper, egg, and flour. For the sauce I used organic mushroom broth, about 1 cup, and thickened it with a little arrowroot dissolved in cold water. I'd say a teaspoon or two dissolved in a splash of water. You can adjust the sauce quantity and thickness to your liking. Just make sure the broth is boiling as you stir in the arrowroot so that it thickens while you stir it.

1.5 lbs of ground beef
3/4 C of finely minced onion
2T of Nutiva Shortening
2T of bacon fat
1 1/2 t coarse salt or 3/4 t of finely ground salt
1/8 t dry thyme
1 C Mushroom broth
1T of Arrowroot starch

Saute the onions in the shortening until translucent and set aside to cool slightly. To the ground beef add the bacon fat, salt, thyme, and onions and mix thoroughly with your hands. Shape the meat into patties or meatballs, whatever shape you like. Cook the meat, preferably in a stainless steel skillet large enough to cook everything at once. Remove the meat and deglaze the pan with 1 C of mushroom broth and thicken to your liking with arrowroot. I use 1 part arrowroot to 2 parts cold water stirred together that I slowly add to the boiling broth.

Here is Julia's full recipe on Food.com. While the burgers were cooking I made a cauliflower mash to go with it. My recipe for cauliflower mash can be found with my Shepherd's Pie recipe.

Monday, February 2, 2015

Paleo Shepherd's Pie

If you're like me you've probably been burned by a few cauliflower recipes so I'm always leery of them too. You can use potatoes in place of the cauliflower or combine potatoes and cauliflower to increase the vegetable content. That's the great thing about cooking, you can alter it to your taste. I made this dish to take to a group of ladies I meet with once a month. Each month a different person brings dinner and this was my contribution. I'm sensitive to white potatoes so I used cauliflower mash instead of potatoes. That night 15 people sat around the room chowing down and no one suspected they were eating cauliflower instead of potatoes until I told them. Since the number of ladies who attend somewhat varies I only made one 13x9 casserole and it wasn't enough. I should have made 2. Since I was rushed by time I failed to grab any photos but I wanted to share this recipe because it went over so well with my friends. The next time I make it I'll be sure to take photographs.

Ingredients:

2 lbs of grass fed ground beef
6 carrots peeled and sliced
1 stalk of celery quartered and diced
1 large bay leaf
1/2 red onion diced
3 cloves of garlic minced
2t salt
4t arrowroot powder
2t paleo worcestershire sauce
1/3C red wine
~3C water

Bring a pot of water to boil to begin steaming the cauliflower. (see below) Turn the oven on to 350F. In a large saute pan begin browning the beef with the onion and salt. When the beef is cooked add the carrots, celery, bay leaf, and garlic. Stir for a minute or two until the garlic becomes fragrant. Add the red wine to deglaze the pan, scrape up any brown bits from the bottom, and allow the wine to almost completely evaporate. If you're making this recipe Whole 30 simply skip to the next step and omit the wine. Dissolve the arrowroot powder in COLD water. The ratio above makes a sauce similar to a chicken or beef gravy you would put on mashed potatoes. If you want your sauce thicker add less water and add more water if you want it thinner. My advice is to start thicker because it's easier to add water to thin it out than it is to wait for water to evaporate. Turn the meat sauce to low while you puree the cauliflower.

Cauliflower Mash

2 heads of cauliflower chopped
6T of Nutiva Shortening, butter, ghee, your fat of choice
1/4C water
1 1/4t salt
pepper


Chop and steam 2 heads of cauliflower. When the cauliflower is fork tender put it into a food processor and puree. If you end up with a chunk that won't puree scoop it out. Add the shortening, salt, pepper, and water and puree. Taste and adjust the seasoning to your liking.

Place the meat sauce into a 13x9 pan and pierce a few carrots with a fork to see how tender they are. If they are pretty firm the casserole will need more time in the oven than if they are fairly soft. Top the sauce with cauliflower mash and cover the casserole with foil. Bake for 20-30 minutes or until the carrots are fork tender. Even if the carrots are cooked to your liking when you assemble the casserole 20 minutes in the oven will help marry the flavors of the two layers. 

Friday, August 29, 2014

Whole 30 Simple Slow Cooker Roast With Gravy


This post is dedicated to all of the people who want to eat better but don't know how to cook or don't like to cook. It's dedicated to those who know that convenience foods aren't healthy but they fall back on them because, well, they're convenient. Eat this roast for dinner; use the leftovers for a salad, sandwich, or a wrap tomorrow; it would even be tasty with a side of asparagus topped with a couple of eggs for breakfast. Use it to make a stew or a stroganoff. When you put your slow cooker to work it is easy to have real food accessible any time of day.

Each shopper values different things so choose the things that matter to you. Here are some of the things that matter to me:

Remember that grain fed beef is full of inflammatory Omega-6's whereas grass fed is full of anti-inflammatory Omega-3's. Cows raised on feed lots contribute to water pollution and they also have significantly higher levels of e.coli. Unfortunately grass fed is more expensive because the government does not subsidize grass, they subsidize corn. Think back to your parents or grandparents generation where they didn't eat huge slabs of meat because it was expensive. Apply those same recipes and stretch your costly cuts with more vegetables. As far as I know Americans definitely have room in their diets for more vegetables. According to choosemyplate.gov half of your plate should be comprised of vegetables. Your best source of meat will be from a local farmer or butcher. You can ask as many questions as you like and see how the animals are raised. Odds are that it will be slightly cheaper than what is found in a supermarket, especially if you buy a package bundle. Buying locally you will know how the animal was treated and you'll also support your local economy.

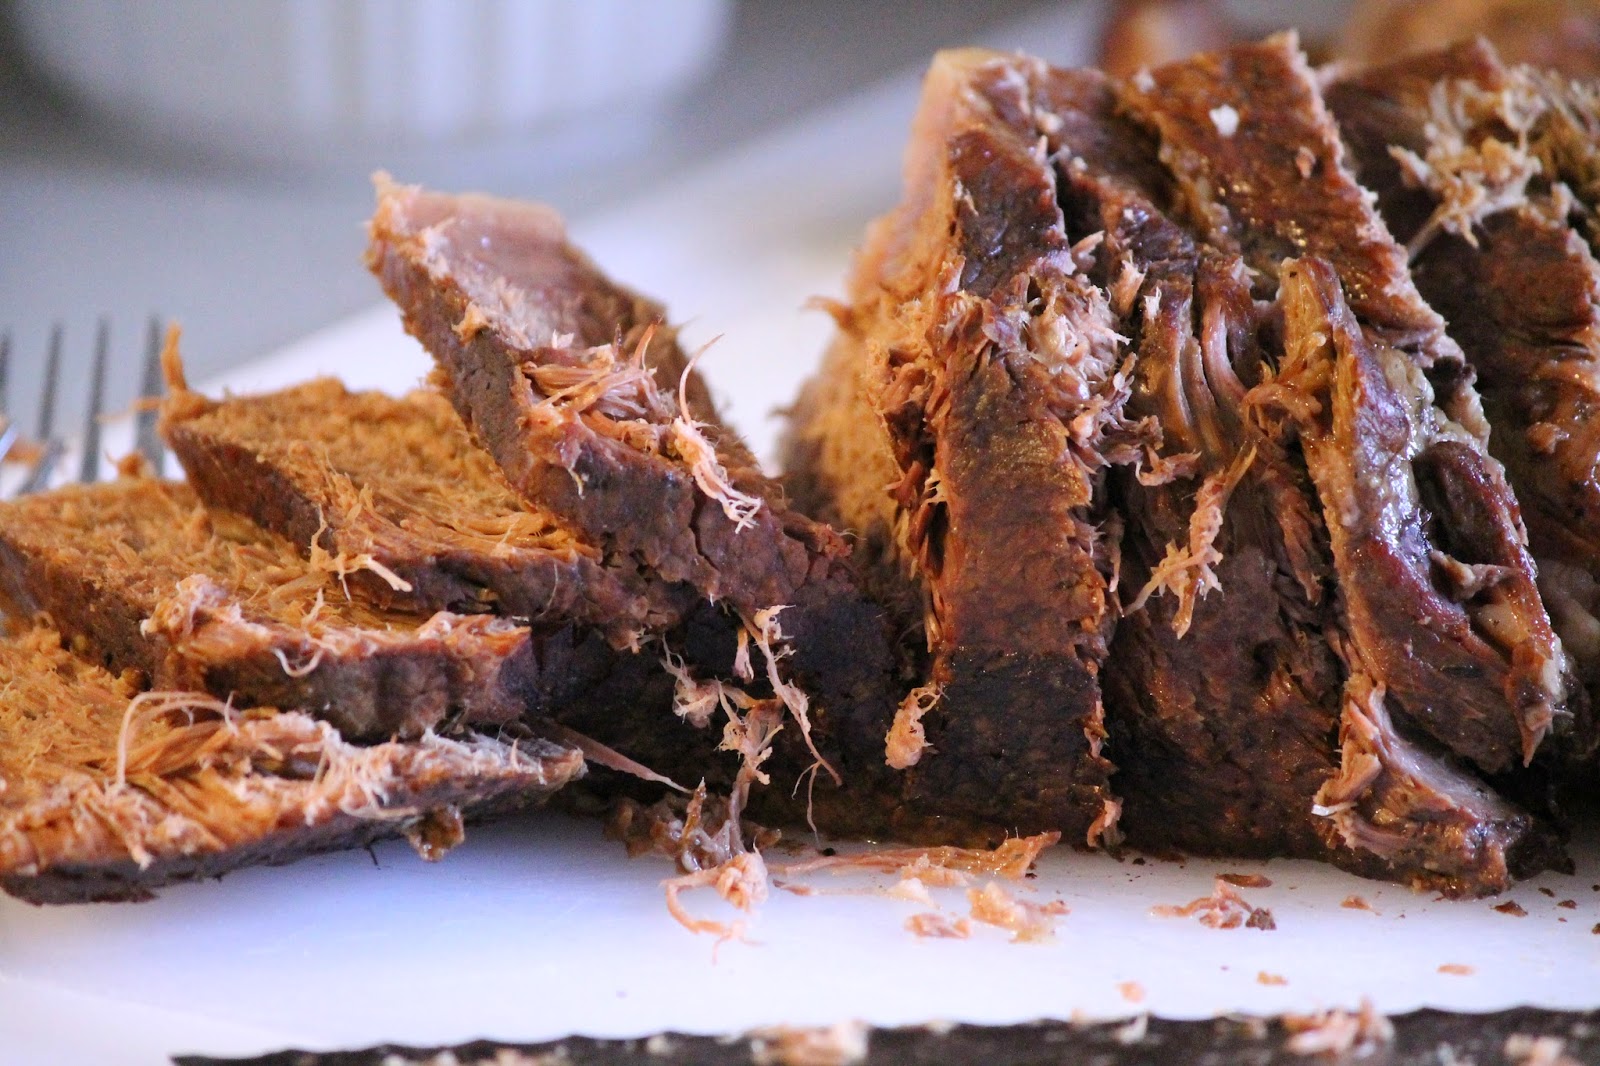
My goal was to put this recipe together with few ingredients but maximum flavor. This recipe also works well for those who are cooking on a budget. Cheaper cuts of meat, (chuck roast pictured), are best suited to a long slow cooking process because they need the extra time for the connective tissue to break down. 


The most crucial step is in the beginning. Browning the roast is where the meaty broth/gravy is created. I have made other recipes by skipping this step and the result reminds me of a sub-par canned stew. Edible, but nothing to get excited about. Trust me, spend a few minutes and brown your roast. In the photo above you'll notice that the roast is sitting on paper towels. Before seasoning with salt and pepper it is crucial that the surface of the meat is patted down with paper towels to remove excess moisture. If the moisture isn't removed the meat will steam in the pan and it won't brown properly. After drying off the roast generously season it with salt and pepper. The roast pictured was 3-4 lbs and I used 1-1.5 tsp of salt and freshly ground black pepper. Brown the side of the roast with the thickest layer of fat first in a pre-heated pan over medium/medium-high heat. This will provide cooking oil for browning the other sides of the roast. Fancy equipment is not required. In the photo below you will see that I used 2 forks to rotate the roast in the pan. Make sure the pan drippings don't burn while you are browning the roast because we're going to use them to help create the gravy for our roast.


After the roast has browned on all 4 sides place it into the slow cooker and add 2 cups of water to the hot frying pan. Using a spoon or spatula, scrape the brown bits off the bottom of the pan and then add the liquid to the slow cooker with the roast. My favorite part about this step is that you've nearly cleaned the pan you just used. To the slow cooker, add 1 tsp of thyme, 2 cloves of garlic, and 1 bay leaf into the liquid. Turn the slow cooker to low and cover it with the lid. That's it! I cooked this roast for 7.5 hours and it was difficult to remove because it nearly fell apart, always a good sign. Place the roast on a plate or a cutting board that has a rim for catching juices and cover the roast with foil to let it rest while you make a gravy. Resting is also important before the roast is cut so that the juices have time to reabsorb. If you cut it right out of the pot it will be dry.


 For the Roast:

3-4 lb chuck roast/pot roast
1-1.5 t of salt
generous pepper
2 C water
1 t dried thyme
1 bay leaf
2 cloves of garlic crushed


For the Gravy:


2 t arrowroot powder
2 c of broth from the slow cooker*
salt and pepper to taste

In a sauce pot on the stove bring the broth to a gentle boil. Dissolve the arrowroot in a tablespoon or so of cold water. It will clump and not dissolve if added to hot liquid. Slowly add the arrowroot while stirring the gravy and remember that its full thickening potential won't occur until the gravy boils. As you can see below this ratio doesn't make a very thick gravy so if you like yours thicker add another teaspoon of arrowroot. I prefer arrowroot to corn starch because I know it is not GMO and it is paleo whereas corn is not.

* Optional: After removing the bay leaf I used an immersion blender to homogenize the broth with the garlic


Roasted Root Vegetables

Carrots can be added to the slow cooker to cook with the roast but I opted for roasted vegetables instead. Dice any root vegetables you like. In this photo I used carrots, parsnips, and a turnip but in the past I've added sweet potatoes, onion wedges, or cloves of garlic with the paper on. Whatever combination sounds good to you.

Toss the vegetables with your favorite oil, salt, pepper, and dry thyme. Roast on a sheet tray lined with parchment paper or a silicone mat at 425 F until the vegetables are tender and browned to your liking. Roasting times will vary depending on the size of your vegetables but it should be somewhere around 45 minutes. 

Saturday, January 11, 2014

Herbes de Provence Crock-Pot Beef Stew

I often hear stories from friends who don't have much time to cook so they are always searching for Crock-Pot recipes. This is a recipe that you could put into a zip top bag and freeze the raw ingredients for future use. In the wintertime I think most of us long for a warm hearty meal and the thing I love about stew is that you can personalize it. Below you will see that I simply added potatoes and carrots but I also love green beans in my stew. My husband always suggests adding corn but with the potatoes I think it is a starch redundancy. Although there is tomato paste in this recipe you could add stewed or diced tomatoes. Just make sure whatever you add can stand up to an 8 hour cook time.

Since I buy most of our meat in the bulk section at Whole Foods I divide it up the day I bring it home. Since grass fed beef isn't easy on the wallet I like to divide it up so that I know how much is going towards each meal. We simply eat more vegetables, which is healthier anyway, so that we can also have grass fed beef instead of grain fed. While putting some stew meat into a zip top bag I decided to season it for stew the next day.

If you haven't yet discovered Herbes de Provence I insist that you buy some. It works with beef, pork, chicken and it makes cooking easy. One of my tricks to buying spices is to look for those that are sold without bottles. For example, you can buy cumin, coriander, oregano, and cinnamon (to name a few) in the Hispanic food aisle. Since they are sold in plastic bags they are $0.50-$0.60 each. Some grocery stores have a bulk spice section where you can simply buy what you need instead of a $4 bottle of spice that may go bad before you use it all. The Natural Grocery store is my favorite place to buy spices because they sell them in their bulk section pre measured by the 1/4 lb. A 1/4 lb of bay leaves cost me $1.08 and there are enough bay leaves to fill a quart sized mason jar. I have forgotten what I spent on Herbes de Provence, definitely not more than a few dollars, and I have enough to fill 3/4 of a quart size mason jar. So don't keep buying new jars, save your jars and refill them. Save money and reduce environmental impact at the same time.

Herbes de Provence Beef Marinade
1-1.5 lbs of grass fed stew beef
2 T olive oil
1t salt
2t Herbes de Provence
10 turns of the pepper mill

Zip the top of the bag shut and massage the contents until everything is equally distributed. Place the bag in a bowl, in the refrigerator, overnight. If I put a zip top bag with liquid contents into the refrigerator it usually leaks. If I put it in the fridge with a container to catch spills then a spill never happens. Murphy's law in the refrigerator I guess.

If you're going to turn this into a freezer meal I'd keep the meat and vegetables separate. Pull the meat from the freezer a day or two before you plan to use it and put it into the refrigerator to thaw. The contents can be dumped directly into the Crock-Pot but to add a flavor boost pull out a stainless steel saute pan and find 10 minutes. Turn the heat to medium high and give the pan time to heat up. When the meat touches the pan it should sizzle. If the pan isn't hot enough don't add the rest of the meat until it is. Back in 1912 Louis-Camille Maillard noticed that meat turned brown when heated in a pan and that is where the culinary world came up with the term the "maillard reaction". Technically it's a reaction between amino acids and sugars in the presence of heat. Why does this matter to you? During the maillard reaction flavor compounds are created. So, find a few minutes and brown the edges of your meat. You don't have to cook it through you're just looking for some browning on the edges. I promise you won't be sorry.

When the edges of the meat are brown dump it into the Crock-Pot. Return the pan to the heat and add 2 tablespoons of tomato paste and stir continuously for 60-90 seconds. Heating the tomato paste in the pan helps bring out the flavor of the glutamates which give dishes that "meaty" flavor. Do not let the contents on the bottom of the pan burn because you will need them in the next step.

Add a cup or so of water to the saute pan and scrape up all of the flavor bits from the bottom of the pan and add the liquid to the Crock-Pot. Dump in the vegetables, 1 bay leaf, 2 teaspoons of salt and fill the Crock-Pot with water until it's about 3/4 full. Set the Crock-Pot to low, cover with a lid, and cook for 8 hours or cook on high for 4 hours. In the first picture below you will see the contents and browned edges of meat just before I covered the pot with the lid.

Remaining Stew Ingredients

2T tomato paste
6 organic yukon gold potatoes
6 carrots
2t salt
10 turns of the pepper mill
1 bay leaf
Add water to fill 3/4 of Crock-Pot


Final result pictured below.