Pages

Showing posts with label side dish. Show all posts

Thursday, June 4, 2015

Bacon and Sage Sweet Potatoes with Maple Syrup

I began this blog because I want to help my friends find REAL FOOD to eat. I'm a stay at home mom with a 4 year old boy so my days are busy with a bundle of energy. Each afternoon we go to Taekwondo lessons and during the day I'm trying to sort our an attempt to homeschool. My husband works in emergency medicine so when he goes to work it's either for 12 or 24 hours. Sometimes he'll work at one of the bases outside of town and he'll be gone for a few days at a time. What I'm trying to convey is that I have a notebook of recipes but I don't always have the time to take perfect photos to go with each one. As the little one gets older I'm hoping to have more time but for now I'll share what I can. Some posts may contain photos taken from my cell phone camera and others may not have any photos. In the future my goal is to go back and remedy this situation but for now I'm going to share recipes as I create them.

These potatoes were FANTASTIC and I'll be putting them on my holiday menu for years to come. Since I gave up added sugar almost a year ago my taste buds have changed and most things that are sweetened for the regular population are entirely too sweet for me. I honestly can't believe that we add sugar and marshmallows to sweet potatoes. They are so incredibly sweet already. So, here is a savory version to balance out the sweetness.

4 sweet potatoes peeled and diced
7 slices of thick sliced bacon
2T of Nutiva shortening, ghee, bacon fat, or butter
12 fresh sage leaves
1/2t salt
3T maple syrup

I've found that the quickest way to cook sweet potatoes is to steam them because they seem to take all day in the oven. I also recently read somewhere that baked sweet potatoes have a higher glycemic index than boiled sweet potatoes. I'm not sure how steamed sweet potatoes rate on the scale but I'm guessing that it has to be less than a baked sweet potato.

Cut the potatoes into bite sized chunks and steam them just until they are fork tender but not mushy. I'm sure it would taste great either way but in terms of appearance and texture I think cooked chunks will work better. For reference, I steamed my sweet potatoes for 20 minutes.

While the potatoes are steaming cook the bacon in the oven. I put a cooling rack on a cookie sheet to catch the oil. That way there are not any splatters or a big mess to clean up. Time and temperature will depend on the thickness of your bacon and how crispy you like it. For thick sliced bacon I use 375F and let it bake 20 minutes or so. After it's cool I cut it into bite sized pieces about 1/2" thick.

When the bacon and sweet potatoes are almost done melt your fat of choice in a skillet and add the fresh sage leaves to fry. Using 12 sage leaves there were hints of sage in the dish but it wasn't overpowering. If you'd like more of a pronounced sage flavor simply use more leaves. Frying sage leaves can be tricky because it's a super quick process. If the leaves turn brown they are burnt whereas they will be dark green when they are crispy. I usually cook both sides for a total time of about 60 seconds, 30 seconds each side. A pair of tongs is very handy for this quick task.

In a bowl add the sweet potatoes, bacon, crumbled sage leaves, and salt. Pour the fat the sage leaves were cooked in over the potatoes along with maple syrup. Toss to combine and enjoy.

Thursday, March 26, 2015

Bacon Kale Chips

Some things just make sense eh? Bacon and Kale go very well together. Also, good quality bacon isn't the cheapest on the shelf. I prefer to buy my bacon from a local source so that I know how the pig was treated. Recently Chipotle took pork off of their menu due to the ethical concerns of how pigs are raised. Between horrible treatment of animals and the questionable ingredients added to bacon I've been playing with making my own. Recipe to come. So if I'm going to go to the effort to source high quality pork, uncured, that doesn't have any nasty chemicals you'd better believe that I'm going to save the bacon fat. Bacon fat is great to cook with. Not only does it have a high smoke point but it also gives amazing flavors to anything you cook in it.

I keep my bacon fat in a mason jar in the refrigerator. For this recipe you'll need to heat the fat slightly. You don't want to turn it into a hot liquid. I popped mine into the microwave for a few seconds. (go in 10 second increments until you achieve the desired consistency) It was still white but was no longer solid.

Here is my bowl of kale chips. It looks a bit empty because I kept eating them while the second and third trays cooked. I wanted crispy chips so I made sure that none of the kale was touching another piece. There weren't many chips on the last tray but I suggest spacing them out instead of overcrowding the chips, no matter how many trips to the oven you have to make.


Bacon Kale Chips

8 kale leaves torn into pieces, stems removed
3T of bacon fat
1/2 t salt

Bake at 350 F for 10 minutes on a cooling rack over a baking sheet. I'd always baked kale chips directly on a piece of parchment on a baking sheet but some parts of the chips came out over cooked from direct contact with the sheet whereas other parts were sometimes soggy. When I cook bacon I put it on a cooling rack over a baking sheet and it comes out perfectly crisp so I decided to give it a try with kale chips.


As you can see below they came out perfectly crisp and not burnt or soggy. The next time I make these I think I'll grind up some cooked bacon into a dust and sprinkle it over the chips before I bake them for an extra bacon kick.


Thursday, March 5, 2015

Asparagus With Mushrooms


When I walked past this asparagus in the supermarket I had to buy two bundles because the spears are so small. That may sound counter intuitive to some but the smaller the spears the more tender they are.


Looking for something different to do with asparagus I decided to add sauteed mushrooms. These aren't just any mushrooms, this is how Julia Child taught me to make mushrooms in her book Mastering The Art of French Cooking. Thinly sliced and browned on both sides, I think this is the closest any food can ever come to tasting like bacon. One of these days I may cook up a bunch just so I can snack on them.


 If you know anything about Julia you know that she cooked with lots of butter. Since I have a horrible reaction to dairy I thankfully have found a replacement. Nutiva makes a shortening (non-hydrogenated and sustainable) that is a combination of coconut oil, palm oil, and red palm oil. The red palm oil gives it a slight buttery flavor and it has a high smoke point. I've tried but I'm simply not one of those people who can use coconut oil in every dish, especially savory ones. Whether you use butter, ghee, bacon fat, or shortening my husband and I decided that THIS is the way to eat asparagus.


Ingredients
3T Nutiva shortening
6 cremini mushrooms thinly sliced
1/2t salt
1/2C water
bunch of asparagus with the woody ends trimmed off.


Melt the fat of your choice in a skillet. Add the thinly sliced mushrooms and 1/4t of salt to the hot oil and cook until browned on both sides.


Remove the mushrooms and add the asparagus and remaining salt to the pan. Stir the asparagus around so that each spear is coated in fat. Add water to the pan to steam the asparagus and cover with a lid.


Cast iron skillets don't typically come with lids. In the past I have used larger lids to cover the pan but condensation eventually begins to drip onto the stove top. One of my new favorite kitchen gadgets is this silicone sunflower in the photo below. You can use it for an airtight seal on bowls or on hot items such as a pot on the stove. I'm saving on plastic wrap and avoiding drips on the stove. Brilliant!


Remove the lid periodically to stir the asparagus. You are aiming for bright green and tender stalks that aren't mushy and complete evaporation of the water added to the pan. When the stalks are bright green there shouldn't be much water remaining. If there is a bit you can remove the lid to let it evaporate if the asparagus is nearly cooked. If the asparagus is completely cooked simply remove it from the pan and don't worry about the water. We don't want to overcook your asparagus.

Top the asparagus with the cooked mushrooms.


Wednesday, March 4, 2015

AIP Faux-tato Soup


The auto-immune paleo diet is strict for good reason but sometimes you just want a bite of something familiar and comforting. When I went to make dinner tonight all of the meat was still frozen and I wanted something quick because it was 6:30 an the little one goes to bed at 8. I learned tonight that parsnips don't cook as quickly as potatoes do so if you're pressed for time cut your parsnips smaller than I did. Like most nights this recipe was simply an experiment of mine and I had no idea how it would turn out when I began assembling ingredients. However, the final result hit the spot and I could barely eat it fast enough.

Faux-tato Soup

2 parsnips peeled and diced (about 2 cups)
2 stalks of celery diced
1/2 of a medium onion diced
4T of palm shortening
3 cloves of garlic
2C of vegetable broth
2C of water
10oz bag of frozen cauliflower
1 bay leaf
1/2t dry thyme
1t salt
3 lg cremini mushrooms thinly sliced
fresh sage leaves

In a large stock pot melt 1T of palm shortening over medium heat and saute the onion and celery until the onion is translucent. Add the garlic and stir a few times before adding the broth, water, bay leaf, thyme, and cauliflower.

While the cauliflower is cooking heat the remaining 3T of palm shortening in a saute pan over medium heat and quickly fry the sage leaves. Remove the leaves and add the mushrooms, cooking until they are brown on both sides. When they are done place them on a paper towel or cooling rack to keep them from getting soggy.

When the cauliflower is fork tender remove the bay leaf, set aside, and puree the contents of the pot with a blender. Be careful of hot liquids and don't fill a blender more than half full. I used an immersion blender tonight. Return the liquid to the pot along with the bay leaf, salt, and diced parsnip. Cook over medium heat, the soup should lightly boil, until the parsnips are tender.

Garnish with mushrooms and sage leaves. I grow sage around our covered patio and it provides me with fresh sage almost year round. Since it's early in the year and I was just playing in the kitchen I only picked about 10 leaves. Next time I'll definitely find more leaves to fry up.

Here is a photo of sage I took last summer. It is nearly the only thing that grows here in southwestern Idaho without human intervention. If you have a dry place in your yard with poor soil I bet sage will grow there.


Friday, August 29, 2014

Whole 30 Simple Slow Cooker Roast With Gravy


This post is dedicated to all of the people who want to eat better but don't know how to cook or don't like to cook. It's dedicated to those who know that convenience foods aren't healthy but they fall back on them because, well, they're convenient. Eat this roast for dinner; use the leftovers for a salad, sandwich, or a wrap tomorrow; it would even be tasty with a side of asparagus topped with a couple of eggs for breakfast. Use it to make a stew or a stroganoff. When you put your slow cooker to work it is easy to have real food accessible any time of day.

Each shopper values different things so choose the things that matter to you. Here are some of the things that matter to me:

Remember that grain fed beef is full of inflammatory Omega-6's whereas grass fed is full of anti-inflammatory Omega-3's. Cows raised on feed lots contribute to water pollution and they also have significantly higher levels of e.coli. Unfortunately grass fed is more expensive because the government does not subsidize grass, they subsidize corn. Think back to your parents or grandparents generation where they didn't eat huge slabs of meat because it was expensive. Apply those same recipes and stretch your costly cuts with more vegetables. As far as I know Americans definitely have room in their diets for more vegetables. According to choosemyplate.gov half of your plate should be comprised of vegetables. Your best source of meat will be from a local farmer or butcher. You can ask as many questions as you like and see how the animals are raised. Odds are that it will be slightly cheaper than what is found in a supermarket, especially if you buy a package bundle. Buying locally you will know how the animal was treated and you'll also support your local economy.

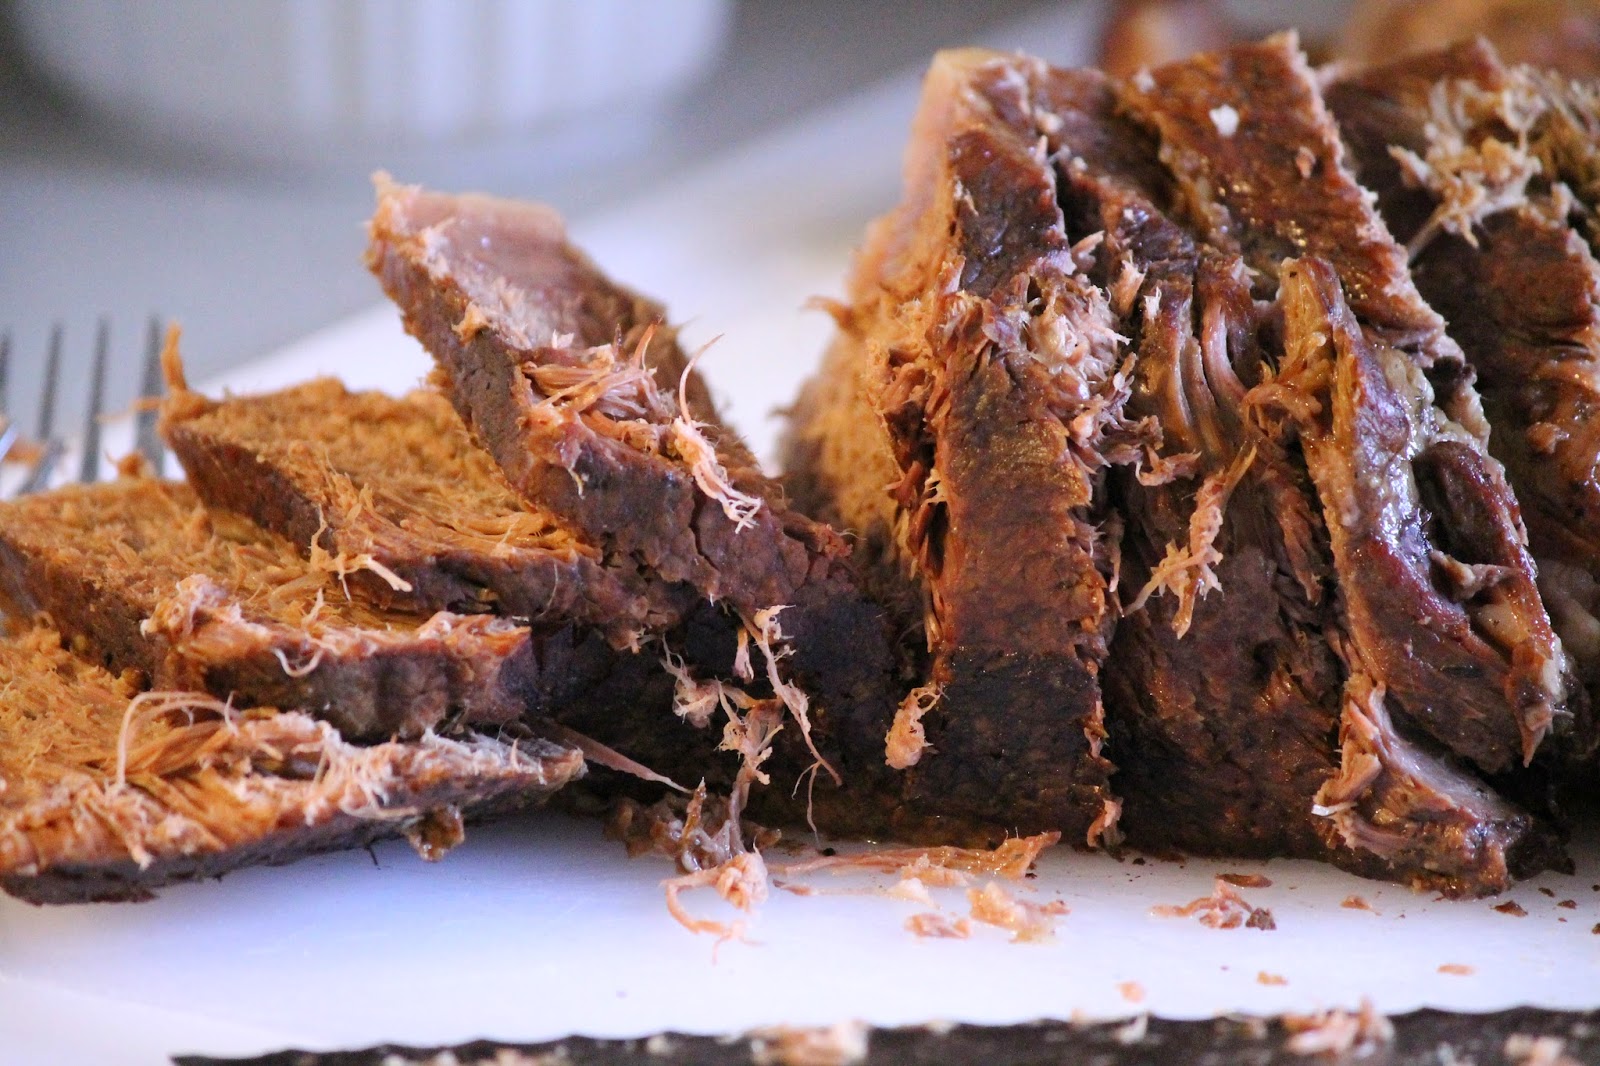
My goal was to put this recipe together with few ingredients but maximum flavor. This recipe also works well for those who are cooking on a budget. Cheaper cuts of meat, (chuck roast pictured), are best suited to a long slow cooking process because they need the extra time for the connective tissue to break down. 


The most crucial step is in the beginning. Browning the roast is where the meaty broth/gravy is created. I have made other recipes by skipping this step and the result reminds me of a sub-par canned stew. Edible, but nothing to get excited about. Trust me, spend a few minutes and brown your roast. In the photo above you'll notice that the roast is sitting on paper towels. Before seasoning with salt and pepper it is crucial that the surface of the meat is patted down with paper towels to remove excess moisture. If the moisture isn't removed the meat will steam in the pan and it won't brown properly. After drying off the roast generously season it with salt and pepper. The roast pictured was 3-4 lbs and I used 1-1.5 tsp of salt and freshly ground black pepper. Brown the side of the roast with the thickest layer of fat first in a pre-heated pan over medium/medium-high heat. This will provide cooking oil for browning the other sides of the roast. Fancy equipment is not required. In the photo below you will see that I used 2 forks to rotate the roast in the pan. Make sure the pan drippings don't burn while you are browning the roast because we're going to use them to help create the gravy for our roast.


After the roast has browned on all 4 sides place it into the slow cooker and add 2 cups of water to the hot frying pan. Using a spoon or spatula, scrape the brown bits off the bottom of the pan and then add the liquid to the slow cooker with the roast. My favorite part about this step is that you've nearly cleaned the pan you just used. To the slow cooker, add 1 tsp of thyme, 2 cloves of garlic, and 1 bay leaf into the liquid. Turn the slow cooker to low and cover it with the lid. That's it! I cooked this roast for 7.5 hours and it was difficult to remove because it nearly fell apart, always a good sign. Place the roast on a plate or a cutting board that has a rim for catching juices and cover the roast with foil to let it rest while you make a gravy. Resting is also important before the roast is cut so that the juices have time to reabsorb. If you cut it right out of the pot it will be dry.


 For the Roast:

3-4 lb chuck roast/pot roast
1-1.5 t of salt
generous pepper
2 C water
1 t dried thyme
1 bay leaf
2 cloves of garlic crushed


For the Gravy:


2 t arrowroot powder
2 c of broth from the slow cooker*
salt and pepper to taste

In a sauce pot on the stove bring the broth to a gentle boil. Dissolve the arrowroot in a tablespoon or so of cold water. It will clump and not dissolve if added to hot liquid. Slowly add the arrowroot while stirring the gravy and remember that its full thickening potential won't occur until the gravy boils. As you can see below this ratio doesn't make a very thick gravy so if you like yours thicker add another teaspoon of arrowroot. I prefer arrowroot to corn starch because I know it is not GMO and it is paleo whereas corn is not.

* Optional: After removing the bay leaf I used an immersion blender to homogenize the broth with the garlic


Roasted Root Vegetables

Carrots can be added to the slow cooker to cook with the roast but I opted for roasted vegetables instead. Dice any root vegetables you like. In this photo I used carrots, parsnips, and a turnip but in the past I've added sweet potatoes, onion wedges, or cloves of garlic with the paper on. Whatever combination sounds good to you.

Toss the vegetables with your favorite oil, salt, pepper, and dry thyme. Roast on a sheet tray lined with parchment paper or a silicone mat at 425 F until the vegetables are tender and browned to your liking. Roasting times will vary depending on the size of your vegetables but it should be somewhere around 45 minutes. 

Thursday, July 10, 2014

Mushroom Risotto with Cambozola

While making risotto last night I had a crazy idea. What if I added the Cambozola instead of the traditional Parmesan? If you are not familiar with Cambozola imagine brie with a hint of blue cheese running through it. The official definition of Cambozola: cow's milk cheese that is a combination of a French soft-ripened triple cream cheese and Italian Gorgonzola. It's delicious no matter how you decide to eat it and frankly I can't seem to eat it fast enough when it's around. 

So what if you're the type of person who thinks they do not like mushrooms? (I used to fall into that category until Julia Child taught me how to properly cook them.) As it turns out, like most things, add butter and you can't go wrong. Look at the close up of the mushrooms below. These are not the gray, slimy, mushrooms you get from a can. These are fresh mushrooms cooked to what I can only describe as perfection.


For this recipe I chose cremini mushrooms because I've developed a fondness for them but please feel free to use whatever mushroom or combination of mushrooms you like. Last night I used 6 cremini mushrooms but you can use as many or as few as you like. That is the great part about cooking, food can be customized, within reason, to suit your taste.

Place a medium sized skillet over medium high heat and add 2 T of butter. (Real organic butter or at least non -RBST butter. No funny spreads out of a tub.) This is the trick I learned from my friend Julia: do not add the mushrooms until the foam and bubbles from the melted butter begin to disappear. If you add the mushrooms before this point the butter won't be hot enough. When the mushrooms are added stir them around and you should notice that they absorb all of the butter, no worries, when they are beautifully brown they begin to release some of this butter back into the pan which is your second sign they are done.

When the mushrooms are done put them in a separate container and begin making your risotto in the same pan. Add another tablespoon of butter and begin to saute 1/2 of a medium onion. When it begins to look translucent add 1 cup of aborio rice, risotto rice, and stir to coat. I've tried this with regular rice and it just doesn't work. Regular white rice doesn't cook, even if you stand there adding liquid for 45 minutes, so don't waste your time or groceries. After a minute or so add 1/2 cup of white wine. Last night I used the New Age white wine; I think it cooks up well without being too oaky or too acidic and it's budget friendly.

Allow the wine to reduce to half of it's volume to make sure the alcohol has cooked off and then add 1 cup of hot chicken stock. This is where you have to take into consideration the saltiness of the cheese you're using and the sodium content of your chicken stock. The chicken stock will cook down so the saltiness will intensify as it cooks. This is very important especially if you are using a salty cheese like Parmesan and also why I do not add any salt, if any, until the end of cooking a risotto. I keep an organic chicken bouillon in the refrigerator which calls for 1 tsp per cup of water. In order to cut down on making the risotto too salty I only add 2 tsp to the 3 cups of water. Stir the stock and rice frequently until most of it has absorbed into the rice and then add another cup. Continue this process until you have added 3 cups of liquid. When the third cup of chicken stock has absorbed into the rice give it a taste test and the rice should be cooked completely. Adjust the seasoning with salt and pepper and then turn down the heat to medium low. Add 2-3 Tablespoons of cambozola cheese and stir until it melts. Put the mushrooms into the rice, stir, and enjoy.


Ingredients
6 cremini mushrooms
3 T of organic butter
1 cup of aborio rice
1/2 cup of white wine
3 cups of chicken stock
2-3 T of cambozola cheese