Pages

Showing posts with label slow cooker. Show all posts

Friday, August 29, 2014

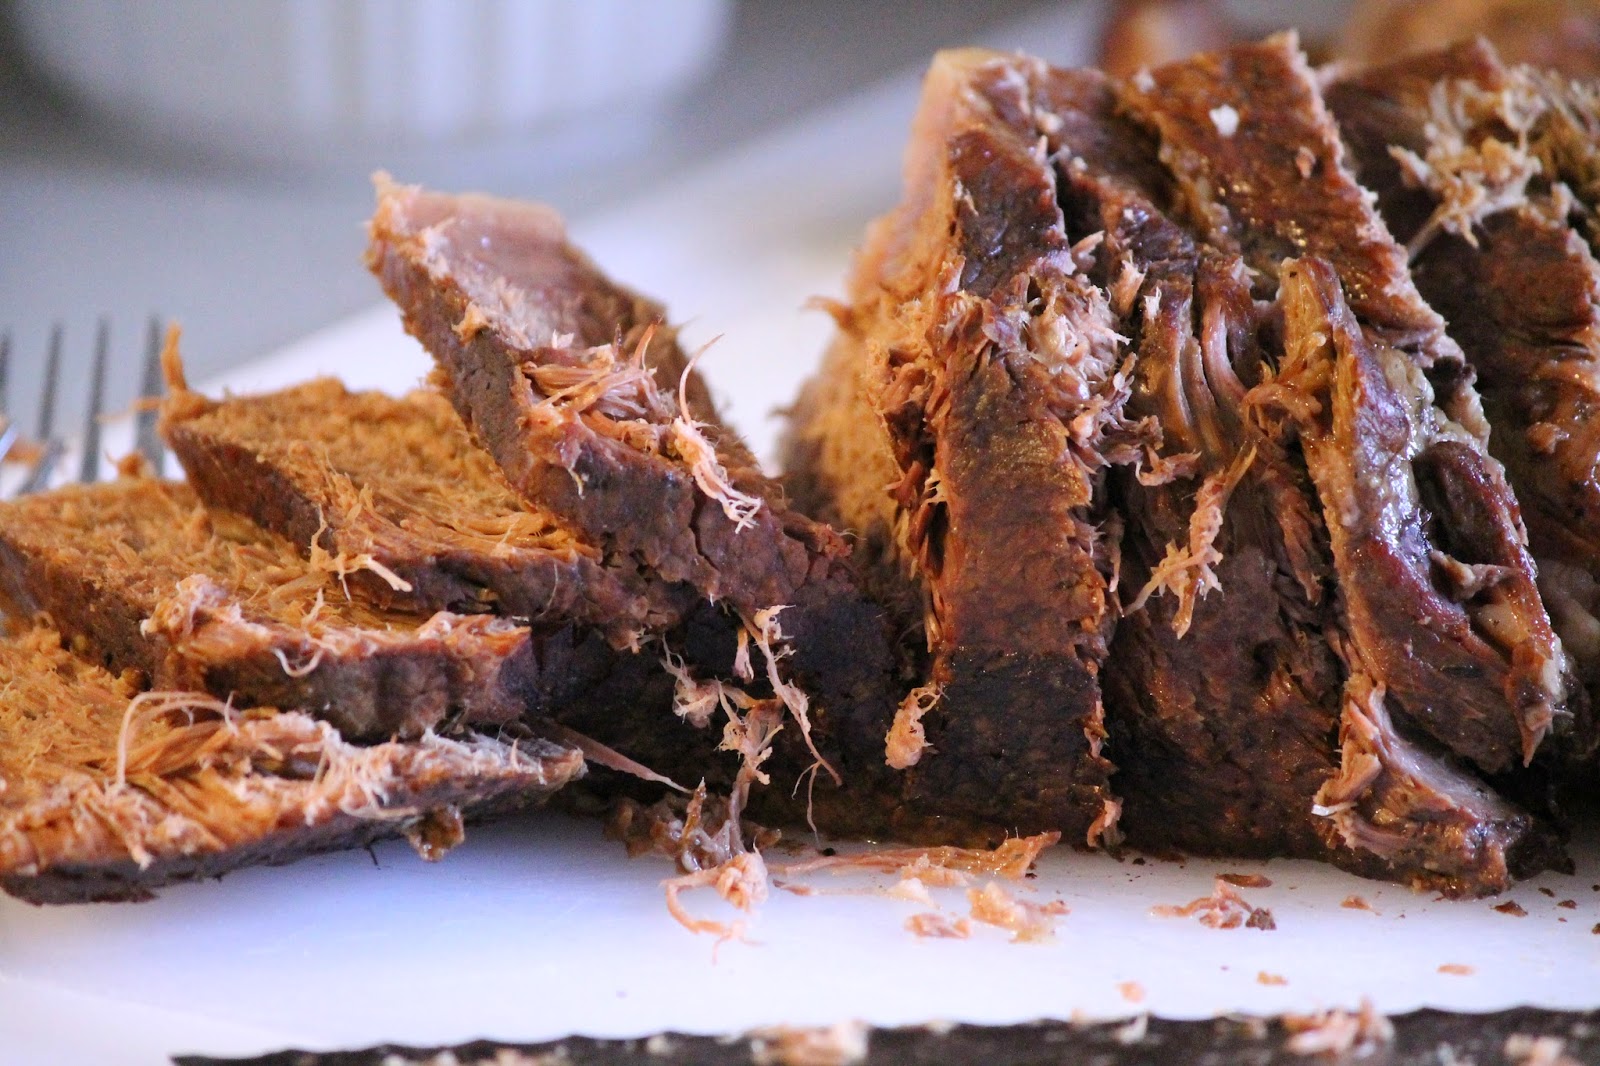
Whole 30 Simple Slow Cooker Roast With Gravy


This post is dedicated to all of the people who want to eat better but don't know how to cook or don't like to cook. It's dedicated to those who know that convenience foods aren't healthy but they fall back on them because, well, they're convenient. Eat this roast for dinner; use the leftovers for a salad, sandwich, or a wrap tomorrow; it would even be tasty with a side of asparagus topped with a couple of eggs for breakfast. Use it to make a stew or a stroganoff. When you put your slow cooker to work it is easy to have real food accessible any time of day.

Each shopper values different things so choose the things that matter to you. Here are some of the things that matter to me:

Remember that grain fed beef is full of inflammatory Omega-6's whereas grass fed is full of anti-inflammatory Omega-3's. Cows raised on feed lots contribute to water pollution and they also have significantly higher levels of e.coli. Unfortunately grass fed is more expensive because the government does not subsidize grass, they subsidize corn. Think back to your parents or grandparents generation where they didn't eat huge slabs of meat because it was expensive. Apply those same recipes and stretch your costly cuts with more vegetables. As far as I know Americans definitely have room in their diets for more vegetables. According to choosemyplate.gov half of your plate should be comprised of vegetables. Your best source of meat will be from a local farmer or butcher. You can ask as many questions as you like and see how the animals are raised. Odds are that it will be slightly cheaper than what is found in a supermarket, especially if you buy a package bundle. Buying locally you will know how the animal was treated and you'll also support your local economy.

My goal was to put this recipe together with few ingredients but maximum flavor. This recipe also works well for those who are cooking on a budget. Cheaper cuts of meat, (chuck roast pictured), are best suited to a long slow cooking process because they need the extra time for the connective tissue to break down. 


The most crucial step is in the beginning. Browning the roast is where the meaty broth/gravy is created. I have made other recipes by skipping this step and the result reminds me of a sub-par canned stew. Edible, but nothing to get excited about. Trust me, spend a few minutes and brown your roast. In the photo above you'll notice that the roast is sitting on paper towels. Before seasoning with salt and pepper it is crucial that the surface of the meat is patted down with paper towels to remove excess moisture. If the moisture isn't removed the meat will steam in the pan and it won't brown properly. After drying off the roast generously season it with salt and pepper. The roast pictured was 3-4 lbs and I used 1-1.5 tsp of salt and freshly ground black pepper. Brown the side of the roast with the thickest layer of fat first in a pre-heated pan over medium/medium-high heat. This will provide cooking oil for browning the other sides of the roast. Fancy equipment is not required. In the photo below you will see that I used 2 forks to rotate the roast in the pan. Make sure the pan drippings don't burn while you are browning the roast because we're going to use them to help create the gravy for our roast.


After the roast has browned on all 4 sides place it into the slow cooker and add 2 cups of water to the hot frying pan. Using a spoon or spatula, scrape the brown bits off the bottom of the pan and then add the liquid to the slow cooker with the roast. My favorite part about this step is that you've nearly cleaned the pan you just used. To the slow cooker, add 1 tsp of thyme, 2 cloves of garlic, and 1 bay leaf into the liquid. Turn the slow cooker to low and cover it with the lid. That's it! I cooked this roast for 7.5 hours and it was difficult to remove because it nearly fell apart, always a good sign. Place the roast on a plate or a cutting board that has a rim for catching juices and cover the roast with foil to let it rest while you make a gravy. Resting is also important before the roast is cut so that the juices have time to reabsorb. If you cut it right out of the pot it will be dry.


 For the Roast:

3-4 lb chuck roast/pot roast
1-1.5 t of salt
generous pepper
2 C water
1 t dried thyme
1 bay leaf
2 cloves of garlic crushed


For the Gravy:


2 t arrowroot powder
2 c of broth from the slow cooker*
salt and pepper to taste

In a sauce pot on the stove bring the broth to a gentle boil. Dissolve the arrowroot in a tablespoon or so of cold water. It will clump and not dissolve if added to hot liquid. Slowly add the arrowroot while stirring the gravy and remember that its full thickening potential won't occur until the gravy boils. As you can see below this ratio doesn't make a very thick gravy so if you like yours thicker add another teaspoon of arrowroot. I prefer arrowroot to corn starch because I know it is not GMO and it is paleo whereas corn is not.

* Optional: After removing the bay leaf I used an immersion blender to homogenize the broth with the garlic


Roasted Root Vegetables

Carrots can be added to the slow cooker to cook with the roast but I opted for roasted vegetables instead. Dice any root vegetables you like. In this photo I used carrots, parsnips, and a turnip but in the past I've added sweet potatoes, onion wedges, or cloves of garlic with the paper on. Whatever combination sounds good to you.

Toss the vegetables with your favorite oil, salt, pepper, and dry thyme. Roast on a sheet tray lined with parchment paper or a silicone mat at 425 F until the vegetables are tender and browned to your liking. Roasting times will vary depending on the size of your vegetables but it should be somewhere around 45 minutes. 

Thursday, August 28, 2014

Paleo Cooking - Turning 2 Chickens into 3 dishes


Getting the knack for Paleo cooking I'm learning that planning is key. It sounds daunting but really I'm not sure why I never thought to cook this way before. Instead of spending an hour in the kitchen every night heating up the house in the summer, why not spend a few hours making a larger quantity and eat that for a few days? Whether the weekend works for you or put your slow cooker to work while you're at work, doesn't it make sense to make more food so that you can cook less often?

The trouble I've had in the past with this method is that I'm not the biggest fan of leftovers. I can eat something twice but then I need to change it up. So my challenge to myself was to mix cooking in bulk with variety.

In my second week of the Whole 30 challenge I came across a recipe from Nom Nom Paleo for chicken with gravy. Michelle Tam, author of Nom Nom Paleo, is responsible for planting the Whole 30 seed for me so I was excited to try her recipe. I've made gravy with flour or corn starch in the past but both are not allowed in the Whole 30. So when I came across this recipe with gravy that was Whole 30 compliant I had to try it.

Michelle cooks a whole chicken in the slow cooker and I discovered by luck that the 2 cut up chickens I purchased the day before fit perfectly into my pot. Since I used 2 chickens instead of 1 I doubled the amoIf you're like me you're not the unt of vegetables and used what I had on hand. I added mushroom broth instead of chicken stock and Herbes de Provence in lieu of the spice blend Michelle used. As you can see in the photo on the left the chicken simply fell off the bone. You can find the recipe on her blog here.


Crock Pot Chicken and Gravy with Pork Paleo Stuffing

My gravy didn't come out as thick as Michelle's but it was delicious nonetheless. Chicken with gravy makes me think of Thanksgiving dinner so naturally I thought of mashed potatoes. However, the paleo world has yet to decide unanimously whether white potatoes are or aren't paleo. So I decided the next best thing was stuffing. Since grains are not part of the diet I decided to make it with ground pork and concoct my own sausage stuffing. I think I'm beginning to like this paleo thing. Not only do I feel better but I enjoy food more because everything isn't served on a bland starchy canvas. Everything has flavor and this sausage stuffing was fabulous.


1 lb of ground pork
1 large granny smith apple
1 medium onion diced (2 cups)
3 cloves of garlic
3 stalks of celery
1 T of celery leaves
6 fresh sage leaves
1/2 t dry thyme
1/2 t salt
1/4 t allspice
1/2 C mushroom broth
pepper to taste

Add the pork to a preheated skillet over medium-medium high heat. When the pork is 3/4 of the way cooked add the apple, vegetables, and spices and cook until the pork is completely cooked through. Add the mushroom broth at the end and simmer the stuffing, stirring occasionally, until the liquid from the broth has evaporated.

Top the stuffing with your favorite cut of chicken and gravy from the recipe above.

For the green beans: I blanched them in salted water and finished with olive oil, salt, and pepper.

Garden Note: Growing sage is incredibly easy because it doesn't require much water. It's a perennial so plant it in the dry spot of your yard where most plants seem to wither and you'll have fresh sage nearly year round. For comparison of growing conditions I'm in southwestern Idaho where it is very hot and dry but we also get snow in the winter.

Chicken Salad

Although I loved the chicken and stuffing I had for dinner I wanted something completely different the next day. I eyed the spinach in the refrigerator and it became my inspiration. My mind began to race with numerous options and when I saw the homemade mayonnaise I finally settled on chicken salad. Melissa taught me how to make mayonnaise in her Well-Fed 1 cookbook and I haven't bought mayonnaise since. I like being able to customize it and decide which seasonings and oil to use. For this particular batch of mayonnaise I used extra virgin olive oil which gave the mayo a hint of the olive oil flavor.


2 healthy portions of chicken salad:
1 T finely chopped shallot
1 T cider vinegar
1 t dry tarragon
1/2 t salt
1/2 C olive oil mayonnaise
1/2 C chopped pecans
1/4 C unsweetened dried cranberries
diced chicken (I used 2 thighs, 1 breast, and 1 leg for this recipe)

Combine shallot, vinegar, tarragon, salt and mayonnaise and stir to form a dressing. Add pecans, cranberries, and chicken. Stir to combine and serve.


I ended up making a second batch of chicken salad the next day to go with my butternut squash soup.


Butternut Squash Soup

Since I made chicken salad 2 days in a row and I ate the stuffing for breakfast I no longer had anything to put the remaining gravy/chicken broth on. Knowing the many benefits of bone broth I couldn't throw it out. If you ever have extra bone broth I urge you to freeze it and use it another day because as far as I know you can't buy it in stores. With winter on the horizon it's great to have on hand in case anyone gets sick because homemade chicken soup really does help fight a cold.

In a crock pot add the following:

1 butternut squash peeled and diced
2 C leftover chicken broth/gravy
2 C water
1/2 t salt
few sprigs of thyme
1 bay leaf
2 cloves of garlic crushed

Cook on low, or high, until the squash is tender. I made this batch on low and pureed it after 5 hours but this is a recipe that would be difficult to overcook. So if you need it to cook while you're at work, no worries. Puree the soup with an immersion blender or in batches in a traditional blender. Just remember that hot liquids expand in a blender so put a towel over the top and keep a hand on it so hot liquid doesn't go flying around the room. Add salt and pepper to taste.

Variation: Add 1/4 t of curry powder to a bowl of soup for an Indian twist


Monday, July 21, 2014

Slow Cooker Carnitas

A few years ago I took a trip to Mexico and I was looking forward to devouring the local cuisine. As it turned out my ecologically pristine resort was the only structure for miles. The resort hosted a lot of Canadians and I wonder if that is why they tried to cook American/Canadian types of food everyday. The food was edible but definitely not anything to get excited about. During my week long visit they only prepared authentic Mexican food ONE night. When I boarded the airplane to come home I was sad because I didn't get the week long authentic Mexican feast I was hoping for.

Luckily in Idaho there are several fantastic Mexican restaurants and I fall in love all over again with every dish I eat. I rarely order the same dish twice because I love trying new flavors and interpretations of everyday ingredients. Street tacos is absolutely one of my favorite dishes and although I've had them with steak and chicken, carnitas are my favorite.

Definition of Carnitas from Epicurious.com


carnitas[kahr-NEE-tahz]
Mexican for "little meats," this dish is simply small bits or shreds of well browned pork. It's made from an inexpensive cut of pork that's simmered in a small amount of water until tender, then finished by cooking the pieces in pork fat until nicely browned all over. Carnitas are usually eaten with SALSA and are sometimes used as the filling in TACOS and BURRITOS.
© Copyright Barron's Educational Services, Inc. 1995 based on THE FOOD LOVER'S COMPANION, 2nd edition, by Sharon Tyler Herbst.
Read More http://www.epicurious.com:80/tools/fooddictionary/entry#ixzz1szutRqGl

Before I set out to make carnitas I found a recipe on Allrecipes.com 

The initial recipe called for a 4 pound boneless pork shoulder roast and a cooking time of 10 hours. Using pork stew meat and a crock pot setting on high I was able to create very tender pork that fell apart in only 4 hours. A 2 pound package of stew meat fed my husband and I carnitas tacos on two separate occasions. We didn't make any rice or beans, just tacos. So I definitely believe this could be an inexpensive dish for a larger family if rice, beans, or even a salad were included as a side dish. For those who do not eat pork this recipe also works well for chicken. I'm not sure how authentic this recipe is but I think it is a pretty good match to the carnitas I love so much.

When it comes to buying pork I recommend buying from either a farmers market or a local butcher shop where you can ask questions about the raising of the pig. Sadly factory farms don't have the best reputation for the treatment of pigs, or other animals for that matter, so get to know where your meat comes from and what's been done to it.

Ingredients

  • 1 teaspoon salt
  • 1 teaspoon garlic powder
  • 1 teaspoon ground cumin
  • 1/2 teaspoon dried oregano
  • 1/2 teaspoon ground coriander
  • 1/4 teaspoon ground cinnamon
  • 2 lbs of pork stew meat
  • 2 bay leaves
  • 1 cup chicken broth

Combine the dry ingredients and toss the pieces of pork in the mixture. Add the seasoned pork to a slow cooker with 2 bay leaves and pour 2 cups of chicken broth around the edges. The chicken broth should be deep enough to see from the top of the pot but not covering the pork. If the pork is going to cook during an 8 hour work day set it on low. To shorten the total cooking time set the crock pot on high and it will be ready 4 hours later. One of the great things about this recipe is that pork becomes more tender the longer it cooks. I'm not saying to cook it for 24 hours but a few extra hours on either setting definitely won't ruin your dish.

Drain some of the juice from the pork before adding it to either corn or flour tortillas. In my local supermarket I can purchase locally handmade tortillas which are phenomenally better if you can find them. Typically street tacos are topped with chopped white onion and fresh cilantro with a lime wedge on the side. (I thought I had cilantro in the refrigerator but it turned out that I didn't.) Trust me, squeeze the lime juice over the taco and I promise you won't regret it. Onion, cilantro, and lime round out the dish perfectly. If you like a little heat add your favorite hot sauce, pico de gallo, or salsa.


Here's the cilantro! I also made rice with cilantro and lime. After the rice is cooked add fresh chopped cilantro and fresh squeezed lime juice to the rice.


Saturday, January 11, 2014

Herbes de Provence Crock-Pot Beef Stew

I often hear stories from friends who don't have much time to cook so they are always searching for Crock-Pot recipes. This is a recipe that you could put into a zip top bag and freeze the raw ingredients for future use. In the wintertime I think most of us long for a warm hearty meal and the thing I love about stew is that you can personalize it. Below you will see that I simply added potatoes and carrots but I also love green beans in my stew. My husband always suggests adding corn but with the potatoes I think it is a starch redundancy. Although there is tomato paste in this recipe you could add stewed or diced tomatoes. Just make sure whatever you add can stand up to an 8 hour cook time.

Since I buy most of our meat in the bulk section at Whole Foods I divide it up the day I bring it home. Since grass fed beef isn't easy on the wallet I like to divide it up so that I know how much is going towards each meal. We simply eat more vegetables, which is healthier anyway, so that we can also have grass fed beef instead of grain fed. While putting some stew meat into a zip top bag I decided to season it for stew the next day.

If you haven't yet discovered Herbes de Provence I insist that you buy some. It works with beef, pork, chicken and it makes cooking easy. One of my tricks to buying spices is to look for those that are sold without bottles. For example, you can buy cumin, coriander, oregano, and cinnamon (to name a few) in the Hispanic food aisle. Since they are sold in plastic bags they are $0.50-$0.60 each. Some grocery stores have a bulk spice section where you can simply buy what you need instead of a $4 bottle of spice that may go bad before you use it all. The Natural Grocery store is my favorite place to buy spices because they sell them in their bulk section pre measured by the 1/4 lb. A 1/4 lb of bay leaves cost me $1.08 and there are enough bay leaves to fill a quart sized mason jar. I have forgotten what I spent on Herbes de Provence, definitely not more than a few dollars, and I have enough to fill 3/4 of a quart size mason jar. So don't keep buying new jars, save your jars and refill them. Save money and reduce environmental impact at the same time.

Herbes de Provence Beef Marinade
1-1.5 lbs of grass fed stew beef
2 T olive oil
1t salt
2t Herbes de Provence
10 turns of the pepper mill

Zip the top of the bag shut and massage the contents until everything is equally distributed. Place the bag in a bowl, in the refrigerator, overnight. If I put a zip top bag with liquid contents into the refrigerator it usually leaks. If I put it in the fridge with a container to catch spills then a spill never happens. Murphy's law in the refrigerator I guess.

If you're going to turn this into a freezer meal I'd keep the meat and vegetables separate. Pull the meat from the freezer a day or two before you plan to use it and put it into the refrigerator to thaw. The contents can be dumped directly into the Crock-Pot but to add a flavor boost pull out a stainless steel saute pan and find 10 minutes. Turn the heat to medium high and give the pan time to heat up. When the meat touches the pan it should sizzle. If the pan isn't hot enough don't add the rest of the meat until it is. Back in 1912 Louis-Camille Maillard noticed that meat turned brown when heated in a pan and that is where the culinary world came up with the term the "maillard reaction". Technically it's a reaction between amino acids and sugars in the presence of heat. Why does this matter to you? During the maillard reaction flavor compounds are created. So, find a few minutes and brown the edges of your meat. You don't have to cook it through you're just looking for some browning on the edges. I promise you won't be sorry.

When the edges of the meat are brown dump it into the Crock-Pot. Return the pan to the heat and add 2 tablespoons of tomato paste and stir continuously for 60-90 seconds. Heating the tomato paste in the pan helps bring out the flavor of the glutamates which give dishes that "meaty" flavor. Do not let the contents on the bottom of the pan burn because you will need them in the next step.

Add a cup or so of water to the saute pan and scrape up all of the flavor bits from the bottom of the pan and add the liquid to the Crock-Pot. Dump in the vegetables, 1 bay leaf, 2 teaspoons of salt and fill the Crock-Pot with water until it's about 3/4 full. Set the Crock-Pot to low, cover with a lid, and cook for 8 hours or cook on high for 4 hours. In the first picture below you will see the contents and browned edges of meat just before I covered the pot with the lid.

Remaining Stew Ingredients

2T tomato paste
6 organic yukon gold potatoes
6 carrots
2t salt
10 turns of the pepper mill
1 bay leaf
Add water to fill 3/4 of Crock-Pot


Final result pictured below.